AUTOMATE YOUR TESTS FOR DYNAMICS 365 FINANCE AND OPERATIONS
Hello Dynamics & Power Community,
A new article for you the community. More specifically, all project managers, functional and technical consultants, as well as customer-side decision-makers on the deployment of Dynamics 365 Finance and Operations.
I told myself that it would be important to offer you a global article on all the testing capabilities (manual or automatic) for Dynamics 365 Finance and Operations. It is the result of quite a long work but which I hope will help you to improve your code delivery and upfrade processes.
As you know, updates to version 10.x are monthly and therefore require operational tests on a regular basis ! I don’t know for you, but for some customers that I know it can take almost 1 week or more for 3 consultants…
In addition, if you want to be in an agile process of continuous delivery in production, it is often necessary to take time with the Key Users or the IT team to ensure that we do not have a regression in any part of the ERP. The more development you add, the longer and more difficult it will be to test all of your processes: this will therefore lower the quality of your deployments and repetitions of bugs in the chain: which will necessarily have a cost but also psychological in trust of the tool and your team.
For my part, I know that this part is often the least urgent in a process, however if this is done from the start of your GoLive and in continuity, you will gain enormously, therefore automating your tests as much as possible to allow time your team to manage more strategic cases (training, designs) that a machine will not be able to automate. This is the motto of the PowerAutomate tool of the PowerPlatform :
“Take Care of what’s important. Automate the rest”
Before going into the details of each testing feature that you can use with Dynamics 365 for Finance and Operations, it is important to clarify a few things, such as :
You CAN’T test everything… well automatically in fact. As you will see in this article, testing some SSRS Reports, layouts, interfaces or other tools will be very complicated to achieve, and a machine is not a human… So keep in mind that all these features will help you to automate as much as possible long tests process, but you will need to do something… Like of course analyzing Plan test reports, see errors log, correct them, tests manual process : but at the end, maybe you will gain 90% of your testing time ! So clearly I invite you to use all the elements that I will present to you.
I will not go very deeper in each parts, because it will be too long ! So of course, you can go directly in each Microsoft documentations to go further in details. But keep in mind, that all documentations are presented separately and it seemed important to me to report everything to you in a single document.
Data integration testingDo not use RSAT (as you will see after) for integration tests, instead rely on the data management framework (also known as DIXF). The Data task automation framework enables you to configure and automate the testing of your data integration scenarios.
Now, we can go !
So, in Dynamics 365 Finance and Operations, you have 3 parts of testing.
While the functional validation of an ERP application can’t be fully data agnostic, there are multiple phases and approaches for testing. These testing phases include:
SysTest framework
ATL frameowrk
Regression Suite Automation Tool (RSAT)
Overview
SysTest framework – The SysTest framework is reliable for writing unit tests. Because unit tests are generally testing a method or function, they should always be data agnostic and dependent only on the input data that is provided as part of the test.
ATL framework – Microsoft has an ATL framework that is an abstraction on the SysTest framework and makes functional test writing much more simple and reliable. This framework should be used for writing component tests or simple integration tests.
RSAT – The RSAT is used for integration tests and business cycle tests. The business cycle tests, also called the regression validation tests, are dependent on existing data. However, these tests can become data agnostic if you consider additional factors.
Where unit tests and component tests are low level and can fully be data agnostic (not dependent on existing dataset), the business cycle or regression validation tests are dependent on some existing data. This data includes setup, configuration settings (parameters), and master data (customer, vendors, items, etc.), but never transaction data. Make sure that during the test, if any of these are being changed, that they are reverted back as part of the final test.
Select master data based on certain criteria instead of selecting a particular record. For example, if you want to select an item based on its dimension values and stock availability, filter the product list with those values, select the first item, and copy the number to be used for future tests. If it’s a simple master data line such as customer, vendor, or item, it can be created as part of the automation and used in future tests through chaining.
Enter the unique identifiers, such as invoice numbers, through the number sequence or by using Microsoft Excel functions such as =TEXT(NOW(), »yyyymmddhhmm »). This function will provide a unique number every minute, which allows you to track when the action happened. This can be used for variables such as product receipt numbers and vendor invoice numbers. These tests continue to work on the same database again and again, without requiring any restoration.
Always set the Edit mode of the environment to Read or Edit as the first test case because the default option is Auto. The Auto options always uses the previous setting and can cause unreliable tests. You can change it in the TEST account that will be used in RSAT (User Option)
Only validate after you filter on a particular transaction instead of generic validation. For example, for the number of records, filter for the transaction number or the transaction date so that the validation excludes all other transactions.
If you are checking a customer balance or budget check, save the value first and then add your transaction value to validate the expected result instead of validating a fixed expected value.

1/ LCS <=> BPM <=> AzureDevOps (via Task Recorder)
You aren’t required to use the Business process modeler (BPM) tool in LCS. However, BPM is the recommended tool if you want to enable the management and distribution of test libraries across projects and tenants. These capabilities are especially useful for Microsoft partners and independent software vendors (ISVs). BPM enables the distribution of test libraries as part of LCS solutions. If you are not using BPM, you can manually create test cases in Azure DevOps and attach developer recording files to your Azure DevOps test cases. You can create developer recording files directly from the Task recorder pane.
On my side, I will show you how to create BPM in LCS before going to record all my process with the Task Recorders.
So, go to your LCS project first. I will assume also that you have already connect LCS and Azure DevOps together.
You can after go to the Business Process Modeler part.

As you will notice here, you have your own BPM and also some done by Microsoft. Of course, in your own company/customer, it’s somehow complicated to have a standard & global but it will be helpful to check the Microsoft BPM to see how it works.

On my side I will create a complete new one to handle testing purpose. “Normally” before a GoLive it’s a task very highly recommended to do with your Key Users, Project Manager and Functional Consultant.

After you can add other child flows, dependent processes etc…
Also in BPM, you can have a VISIO model of Flow charts, of all your process in the ERP, has defined in LCS. It can be also a good way to add requirements in AzureDevOps before jumping to do customization. Clearly it’s high level definition, but useful also to not forget some specific process, as well as doing some tutorials practices based on that : as you will see also in Task Recorder, you can do your training documentation with screenshots. That’s why if you do it at the very beginning stage of your implementation, all these process conception will help you not just for testing purpose after or before GoLive !!
If you want to learn more, you’ll to go there in the Microsoft documentation below :LEARN MORE ON BPM IN LCS
Now that I’ve done my BPM in LCS, i will need to go to FinOps instance to record all my process flow.
Quick tips : Download the Extension to have the featue for Google Chrome to take screenshots (good way for training documentation) :
https://chrome.google.com/webstore/detail/d365-for-finance-and-oper/inifapcodikhojbnbafaalgbgkfmnlob/related?hl=en-GB
Go like in an UAT instance, where you have some DEMO data in it or maybe already a copy of your production/live database. Of course, the mandatory data is to have all your reference and master data in it in order to have a whole complete process. (like for my customer flow : Customer Group, Tax Group etc…)
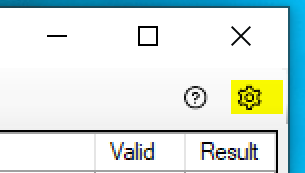
When you are in FinOps, go to the top right !
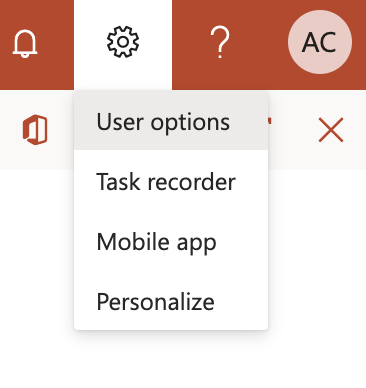
Click on “Create recording”
Give it a name and description if you want. (good if you have multiple different type of flows to create a customer) – activate take screenshots option if you also intend to generate documentation, in addition to being able to recover the trace file for automated tests.

Well, next, you need to do your process 🙂
After end your task recorder, and keep in a safe place your .AXTR files ; like in a Sharepoint folder.

have added a new custom field.
And here are few more best practices :
Follow these guidelines when authoring and recording your test cases, especially if you are planning to automate test execution. The process and tools described in this article apply to business process acceptance tests. They are not meant to replace component and unit testing that is typically owned by developers.
Author a limited number of test cases that, when combined, cover complete end-to-end processes.
Focus on business processes that have been customized.
An individual test case (recording) should cover one or two business tasks only, typically executed by one person. This simplifies task recording maintenance. Do not combine a complete end-to-end business process such as « Procure to Pay » or « Order to Cash » into one large task recording. For example, instead of having RFQ > Purchase Order > Product Receipt > Vendor Invoice > Vendor Payment as one test case, divide the process into three or four test cases. You will have the opportunity to combine these tests into an ordered test suite later.
A test case should have at least one validation. Try to validate critical fields that cover the impact of other fields. For example: Validation of totals on sales or purchase orders cover the unit price/quantity/discount/tax …etc.
Avoid printing a report in a test case. If a test case needs to print a report, it should be selected on screen.
80+% of test cases should be of transactions or source documents. Master data should be limited to up to 20% of test cases only.
Saying that, let’s go again in our BPM library that we have created earlier. We will attach our task recorder file in it.
For that, just click on upload.

Now we will sync it directly to our AzureDevOps Project, to create all our test plan and create every unit test case for every process that you have attached a task recorder file.
You will need to click on the 3 dots, right after the Collapse button and click on the two like me :

Now you can go to your Azure DevOps / VSTS tenant.
You will need an account that have a MSDN subscription or at least a Basic Licence + test plan in order to do automate testing. So take 1 or 2 licences, essentially for the account that will configure all test plan. The basic licence is at 5 euro/month/user and the basic + test plan is more than 40 euro/month/user so not the same cost, but compared to the gain in effort by continuing to carry out only manual tests, believe me you will necessarily largely recover that…
I have created a Test Plan called : RSAT for the tool Regression Suite Automation Tool that I will explain after. But you can call it more with a friendly name, like “Regression test for 10.0.9 upgrade”. Of course it’s like a folder of every test case suite that we will attach after, to have a global overview of every tests cases.
It will be also here that you can see Chart, progression testing report, based on a time purpose, priority, logs. You can copy/past a whole test plan, every week-month, like for upgrade process.
Attach like me the test cases that are normally been in VSTS, since you have synced in LCS before in the BPM.

You will see in a test case, like the Customer flow that I’ve done before some informations. The tag “LCS:TestCases” in order to quickly see all synced tests with BPM in LCS. You will see every steps actions, and in attachment you will have the .AXTR file needed for automate the test with RSAT after.

2/ RSAT – Regression Suite Automation Tool
Overview
The Regression suite automation tool (RSAT) significantly reduces the time and cost of user acceptance testing (UAT). UAT is typically required before you take a Microsoft application update, or before you apply custom code and configurations to your production environment. RSAT lets functional power users record business tasks by using Task recorder and then convert the recordings into a suite of automated tests, without having to write source code. For more information about Task recorder, see Task recorder resources.
RSAT is fully integrated with Microsoft Azure DevOps for test execution, reporting, and investigation. Test parameters are decoupled from test steps and stored in Microsoft Excel files.
RSAT usage is described here in this schema :

First, you will need to install it 🙂
Windows 10 and needed also Excel app.DOWNLOAD RSAT
But before going to RSAT directly, go back to your Azure DevOps, you will need a Personal Access Token.


Create a new one for RSAT, and make him as expiration date in 1 year, to be safe 🙂
After you need to configure it, to link of course on which environment you need to do your automate testing and. also the Azure DevOps project in which you have setup all test cases.
Change your Azure DevOps URL, put your Personal Access Token generated before, you will now use your Project and the Test Plan created in Azure DevOps before.

After it’s a little more complicated.
Put your hostname, the URL of your FinOps instance without HTTPS.
For the SOAP Hostname, it’s the same but with aossoap between the firstpart of your hostname and .sandbox part. Like me below :

Put your admin user name email address. The account that will launch every test in your instance. And the company name / legal entity. Keep in mind that we can change on every test the legal entity in a parameter file.
For the Thumbprint, it’s a certificate to generate on your computer. Click on new. Copy the number. You will need a technical guy to put it in the environment where you plan to execute the TEST.
In the wif.config located in K:AosServiceWebRoot
-> Don’t forget to apply on each AOS Server !
Save a Working Directory folder and also Default Browser to Google Chrome. Don’t forget after configuration to click on Save As, in order to save the configuration and maybe share it for other consultants in your project.
Load your test plan and click after on Generate Test Execution and Parameters files.

You need to have all your test cases here and now you can check on each the Parameter files and change everything needed.


You can pick one, like the Customer RSAT process. And click on “RUN” ; before a small warning , click on YES.
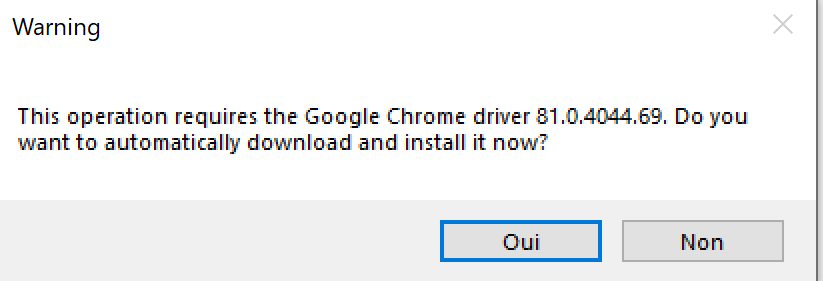
Normally, Google Chrome will launch automatically and test everything without any actions on your hand !!
So maybe a good way is to install RSAT on a network server machine or a VM in Azure and launch every tests on night, without to keep your local machine / PC turned on : because it can takes some time, depending on the amount of test you have.
At the end, you can see the result directly in RSAT on each of them.
But the best way is after to upload the result directly on Azure DevOps. So that everyone, especially Technical Guys can get the log files in there if they are some errors.
For that, click on Upload part and “all modified automation files”

Now go to your Azure DevOps Test Plan.
You can see all Recent test runs

If we go to the one of RSAT that goes well.

You can have all the Log needed, tracked by RSAT.
On something that went wrong… but in unit test with SysTestFramework that we will see after, the developer can have the .AXTR file generated for her/him.
Also we can generate automatically a Bug/Work Item based on a failed test and alert me 🙂

For Project Manager, we have also a report that we can change if you want !

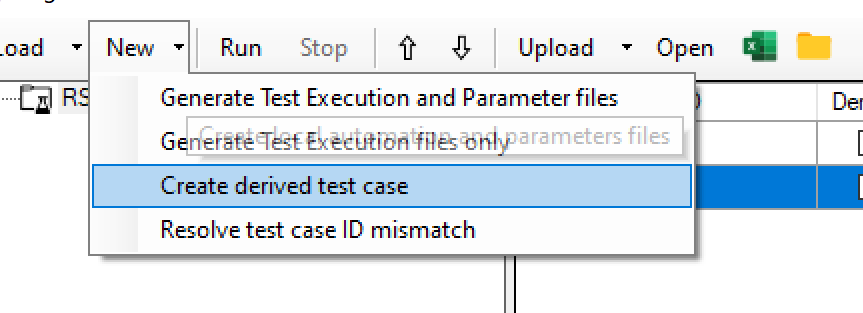
To conclude RSAT, yes we can deeper. I don’t have setup this kind of thing in this example, but you can of course :
Create derivated test case : The Regression suite automation tool (RSAT) lets you to use the same task recording with multiple test cases, so that you can run a task with different data configurations. To do this, select a test case in the Regression suite automation tool and then select New > Create Derived Test Case. This creates a child test case in Azure DevOps. The resulting derived test case is linked to its parent test case in Azure DevOps. It has an Excel parameters file attached but no recording file. The derived test case will appear in the Regression suite automation tool grid under the same test suite with the Derived column selected. Derived test cases are named after their parent test case with a numeric suffix.
Chaining : One of the key features of the Regression Suite Automation Tool is the chaining of test cases, that is, the ability of a test to pass values to other tests. Test cases are executed according to their defined order in the Azure DevOps test plan, which can also be updated in the test tool itself. It is important to correctly order the tests if you want to pass variables from one test case to the other.To save the value of a variable while recording the test in Task Recorder, right-click the field and select Task recorder > Copy, as shown below. This will save the variable in the recording file. This variable can be used in subsequent tests.
Validate expected values : An important component of a test case is validation of expected values. You can define validation parameters during the authoring of your test cases using Task Recorder. While recording, right-click on a control and select CurrentValue under the Task Recorder > Validate menu. This action becomes a validation step that you can use with the Regression suite automation tool. The control value will become a validation variable in the automatically generated Excel parameters file. The menu item is shown in the following image.

When RSAT generates the Excel parameter file for a test case, validation steps are added as shown in the image below. You can enter the expected value to use during execution of the test case.

3/ SysTestFramework and ATL : Acceptance test library

Key concepts
Use SysTest Framework to author unit/component test code.
Test isolation
Test module creation to manage test code and FormAdaptors.
Import Task Recorder recordings into Visual Studio to generate test code.
Overview of the ATL framework
Integrate a Test module with a build machine.
Clearly this part is mostly for developers, but I think it’s useful also for project manager or functional consultant to know which unit test in the code can be done, despite the RSAT tool that we see before. In fact, all task recorders can be a good start to include it in the Development machine to generate simple test case, but I will show also other Framework that developers can use to be more confident before pushing a new development in a TEST environment…
So, first best practice, before going to start writing tests, you will need a new model for that ! To achieve that, go to your Visual Studio and create a new one like me :

Important after, select your reference package. Like me, I select my main package of custom codes – solution to TEST
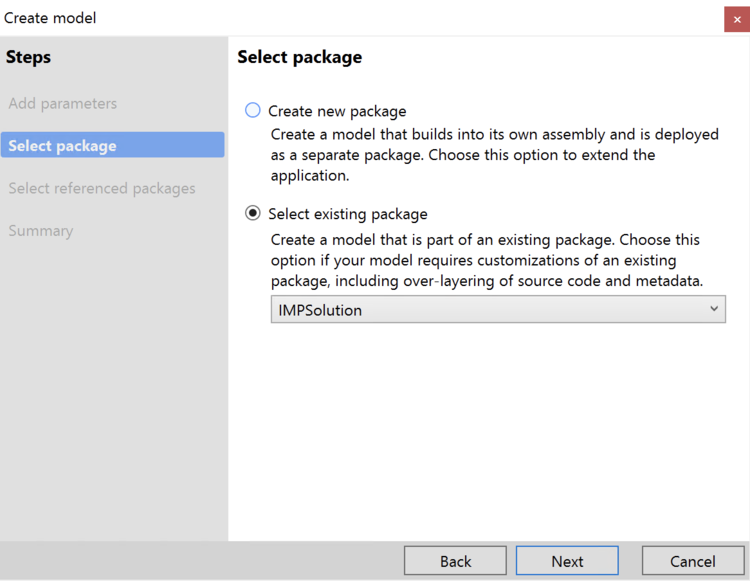
Check : Create new project, it will here where you will place all your unit tests – and don’t of course make it as the default model for new projects.

After the model is created, change the reference packages, to include ALL FormsAdaptators models, and the main one : Test essentials model !
Also put your main VS project as the Startup object !

So now, you have your TEST model, all referenced packages included, include your main one of course. You can now built custom test unit code with SysTestFramework;
On my side, I will use the Task Recorder Add-in in VS, but of course, you can built your own one without addin. Especially to test custom method on a custom class etc…
To generate test class automatically, click on Addins / Import Task Recording

Import the file that you have in the AzureDevOps Unit Test case that we see before (like me : Recording.xml) : as you can see BPM / LCS and Azure DevOps is not only for RSAT !
Select of course your new model for testing purpose.

You will have a new generate class, like me
Change just the top of the class, like adding a SysTestCategory, it will be helpful by doing some filters in the BUILD pipeline of Azure DevOps. Select the legal entity where you want to achieve your test and also add an AutoRollback statement in order to erase all your data after testing process.
This class is of course simulate each UI testing, as well as data / business process testing.

You can of course directly after run & check if your TEST is OK in your DEV environment by going in the Test Explorer view.

This test can be now included in your version control to be used as the BUILD pipeline step in order to automatically runs every night all your SysTest Framework test.LEARN MORE ON SYSTEST FRAMEWORK
Since 10.0.2 I think, we have now a new Test Framework in order to achieve more testing class, as far as I seen it’s really much better & easier than SysTestFramework.
The Acceptance test library (ATL) is an X++ test library that offers the following benefits:
It lets you create consistent test data.
It increases the readability of test code.
It provides improved discoverability of the methods that are used to create test data.
It hides the complexity of setting up prerequisites.
It supports high performance of test cases.
Since I don’t want to rewrite all the Microsoft documentation and since it’s very well good documented, I highly recommend to have a look on it for developer.LEARN MORE ON ATL FRAMEWORK
4/ Change your BUILD & Release pipeline in AzureDevOps
Now go to your AzureDevOps project, on the BUILD pipeline part. We will change the pipeline to include automate testing from SysTest Framework or ATL that we saw before.
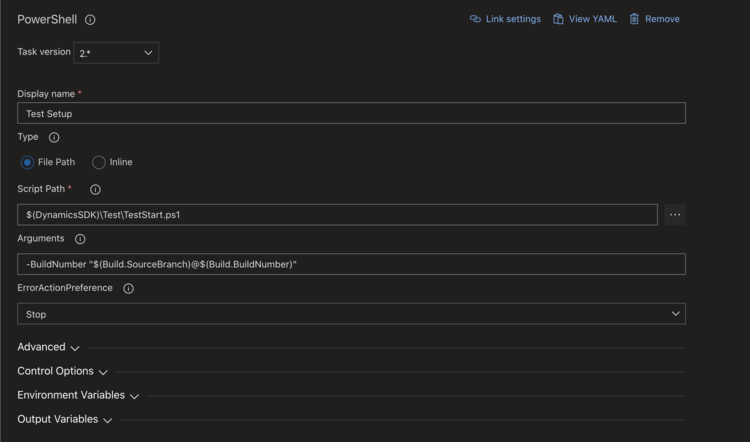
On my side, I’ve got a BUILD Main, only one. So of course, change & adapt on your needs. Enable the 3 tasks at the end : Test Setup, Execute and End Tests.

For these 3 steps, don’t need to change large setup, Just use Task version 2.* and the only change is on the Variable part, to include the SysTestCategory that I had before, remember 🙂 also added my main model.dll that host all my test class.


So here we are you are a Pro of Automate testing in Dynamics 365 Finance and Operations.
To conclude, we can also use PowerAutomate with AzureDevops : doing a morning a test plan report email ? Also create an adaptive card for deployment approval on release pipeline after seeing the test report ?
Well as you can see, you have now all in your hands features to achieve a lot automate testing.
Don’t hesitate to contact me and follow on social networks if you need more details about something.
And don’t hesitate to share it ! See you later 🙂